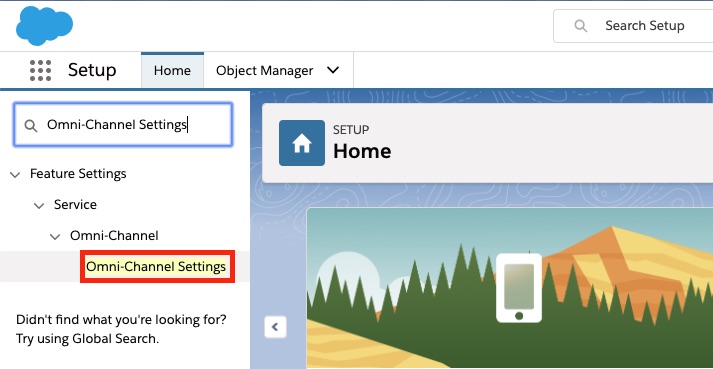
Step 1. Enable OmniChannel
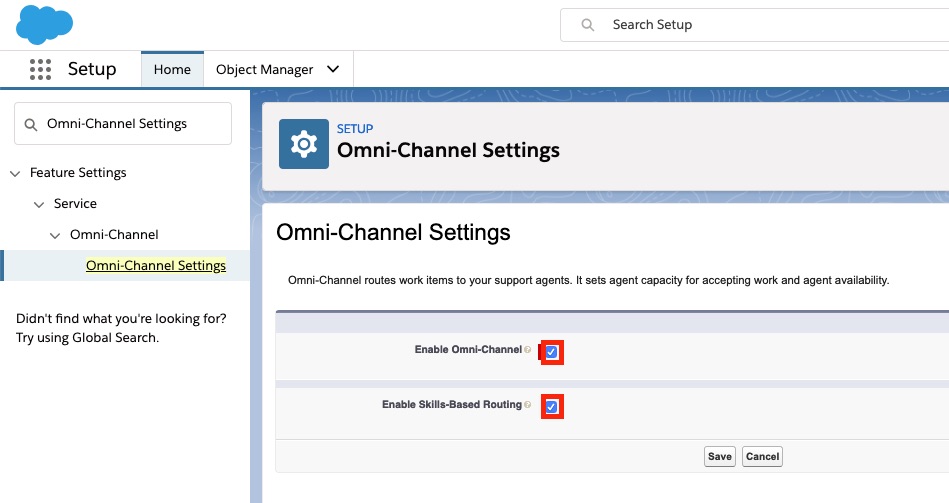
To enable OmniChannel, go to your settings, and quick search "Omni-Channel Settings"
Select "Enable Omni-Channel". A new line appears asking you if you want to enable "Enable Skills-Based Routing". Select it as well
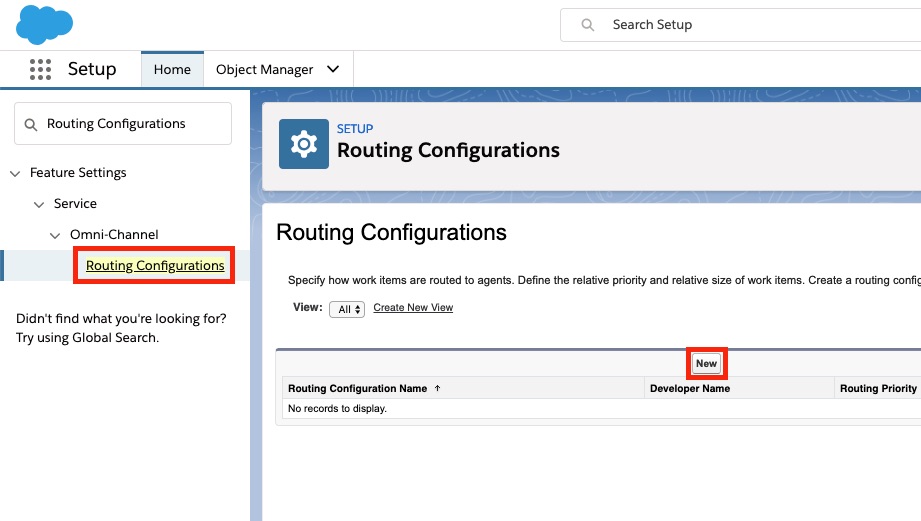
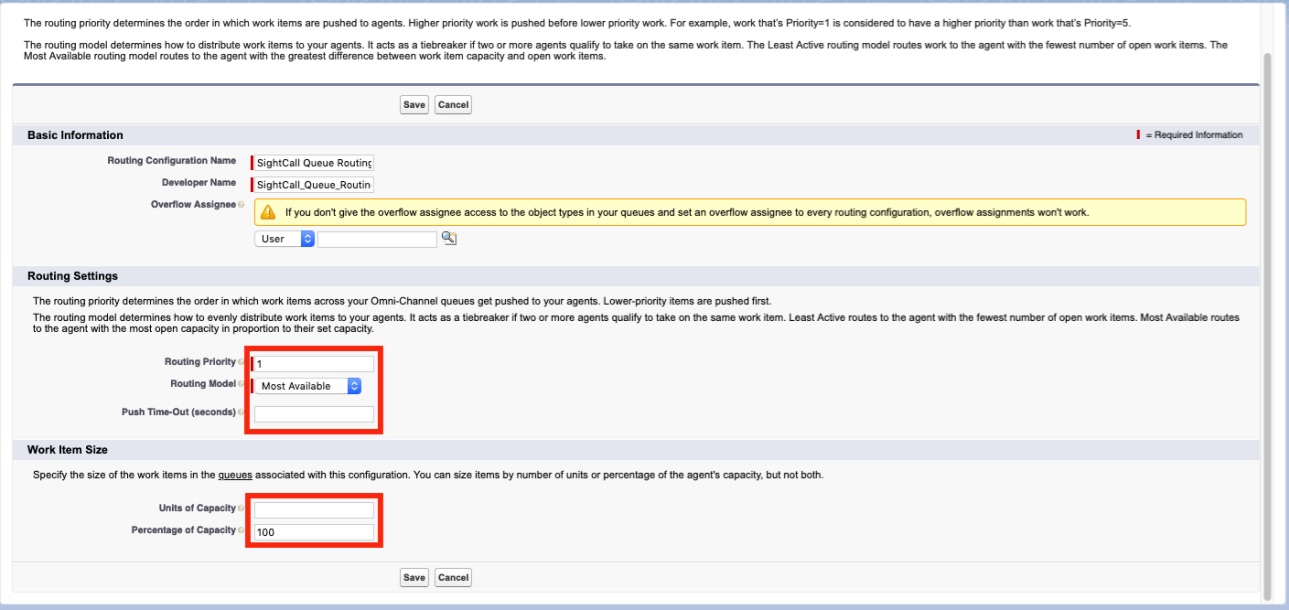
Step 2. Create the SightCall configuration for OmniChannel
We need to create a specific OmniChannel configuration that SightCall will be able to talk to.
Step 2.1. Create a new Service Channel
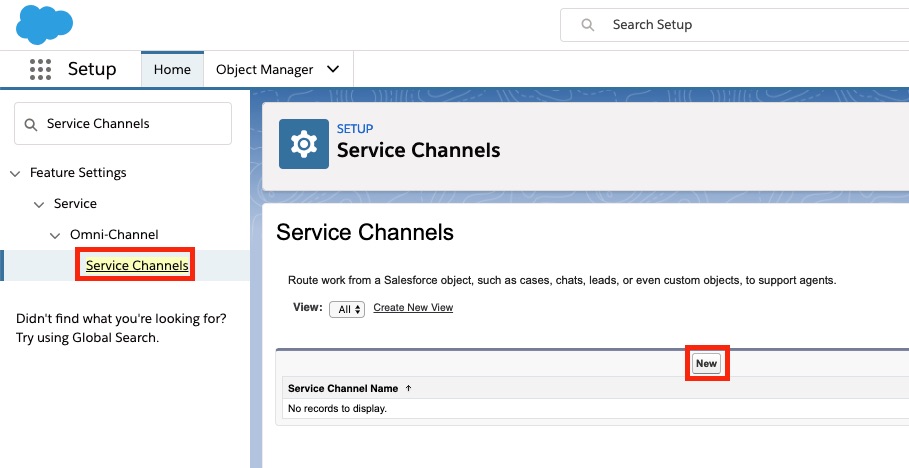
In the Quick Search box, type "Service Channels". Select it and click "New"
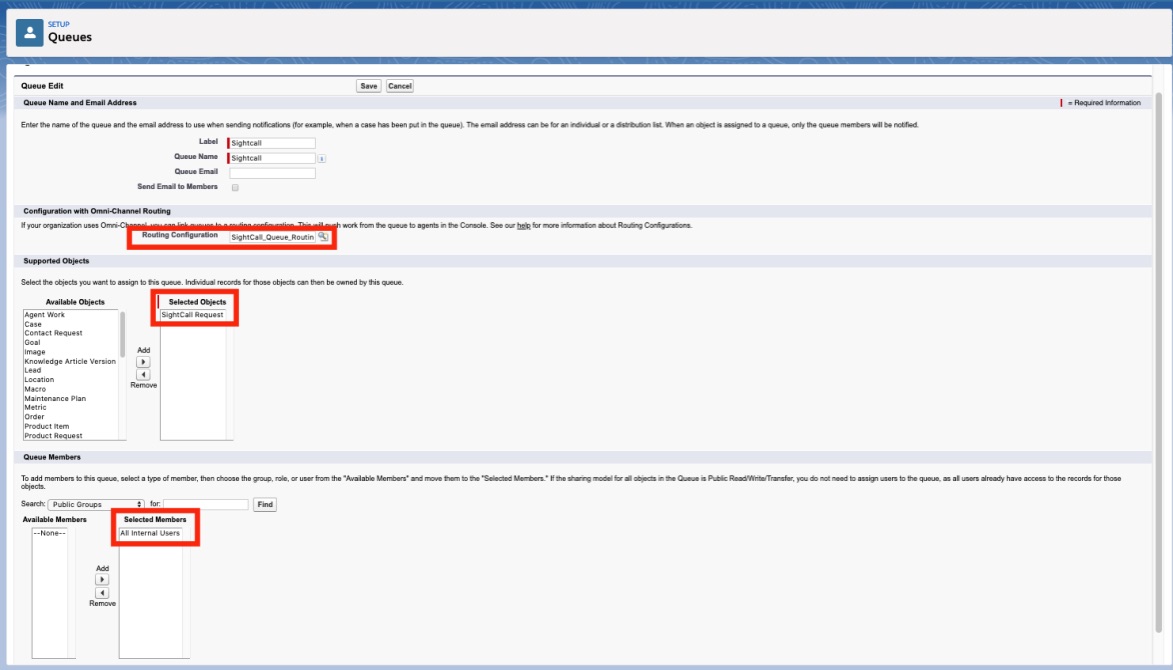
Create a new configuration. The Name and Developer Name is your choice, but select SightCall Request as the SalesForce Object
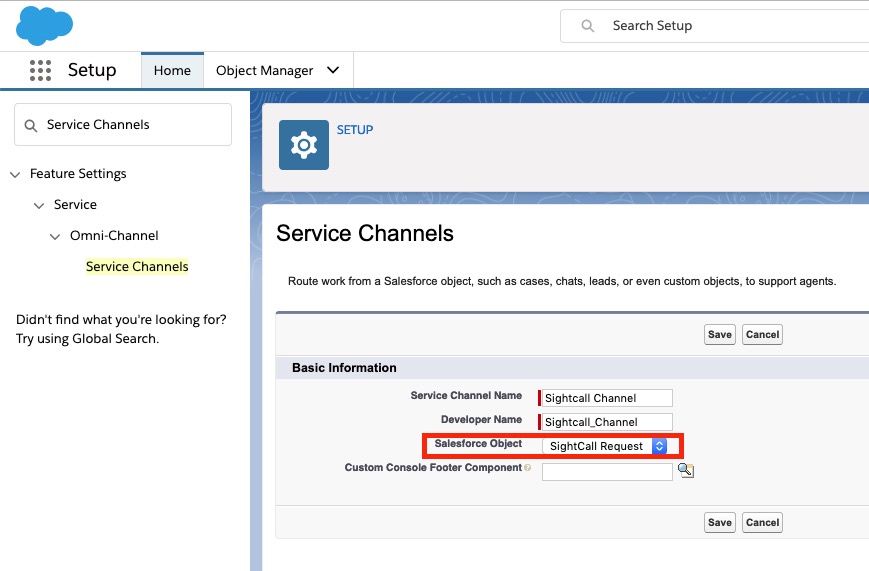
Save your new Channel.
Step 2.2. Create the Presence Statuses
In the Quick Search box, type "Presence Statuses". Select it and click "New"
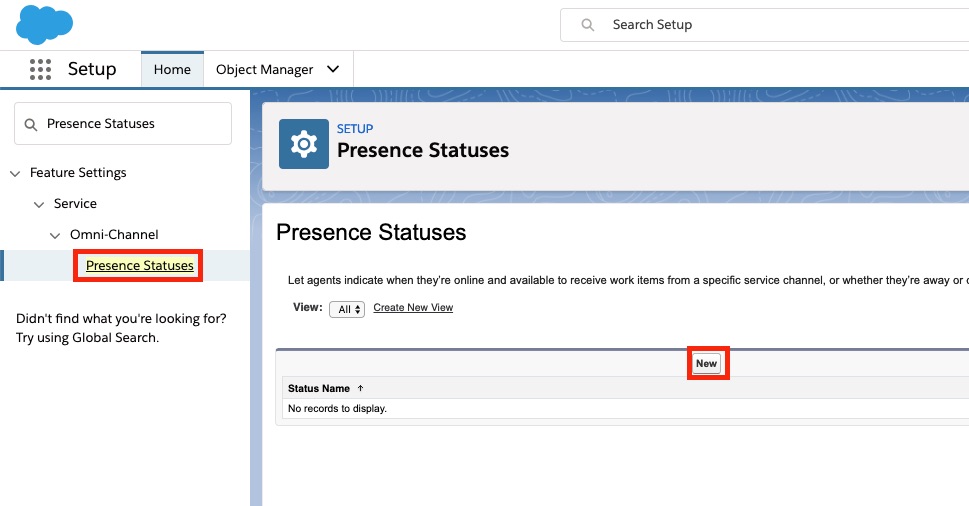
We need to create two different configuration : Online and Busy.
Create a new configuration. Name it Available SightCall. assign it to your newly created Service Channel

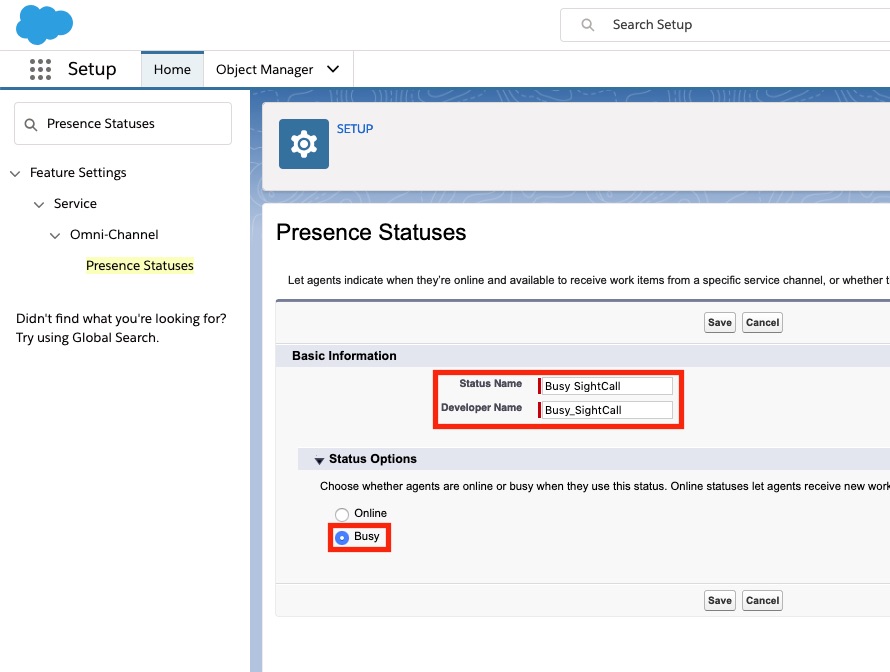
Create a new configuration. Name it Busy SightCall. Check it as Busy status
We now need to give access to these Presence Statuses for the OmniChannel agents
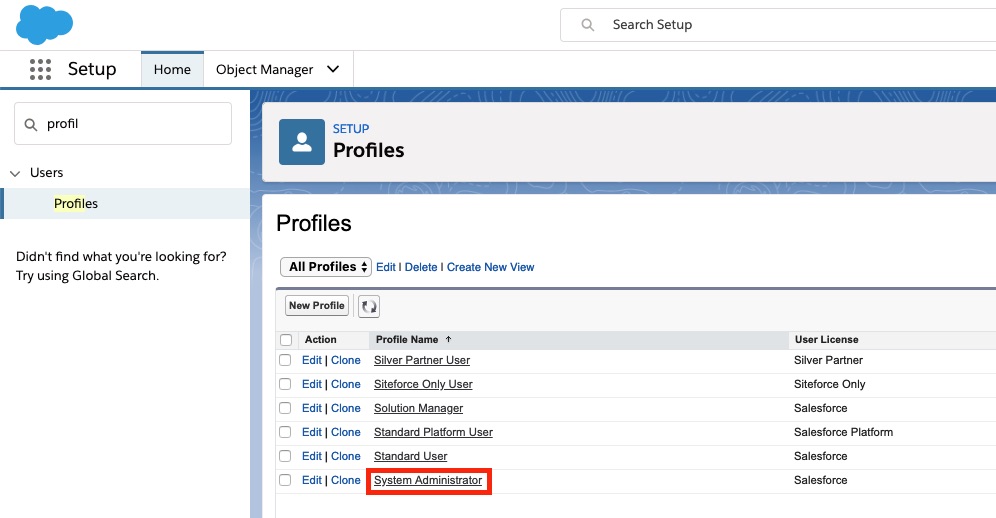
In the Quick Search box, search for "Profiles", and select "System Administrator"
Hover on "Enabled Service Presence Statuses" and then click on "Edit"
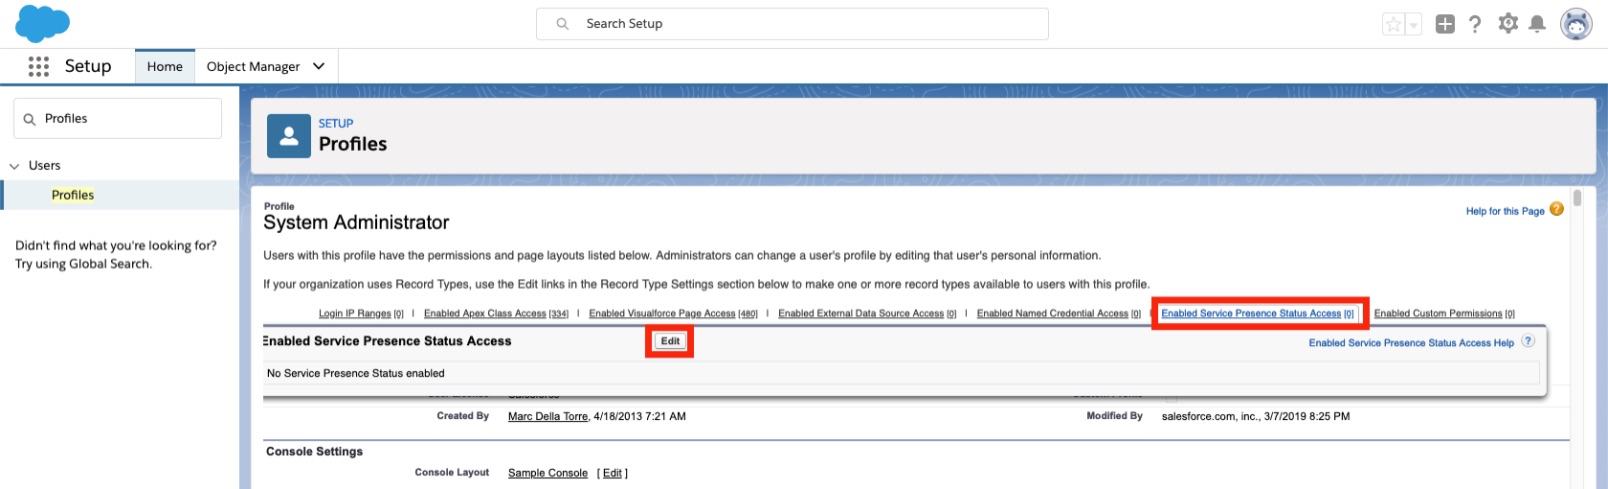
Add your newly created presence statuses, and save

If you had OmniChannel already up and running and already configured your users, you should be all set. SightCall is now enabled to use OmniChannel. Don't forget to add the OmniChannel utility item in the application containing SightCall
If you haven't created any OmniChannel users yet, we will do it
An Omnichannel user is called an Agent. An agent is a specific type of a "Service Ressource". This is the kind object we want to create
Step 2.4.1 Check that you can see the Service Resource tab
In the Quick Search box, search for "Profiles", and select "System Administrator"
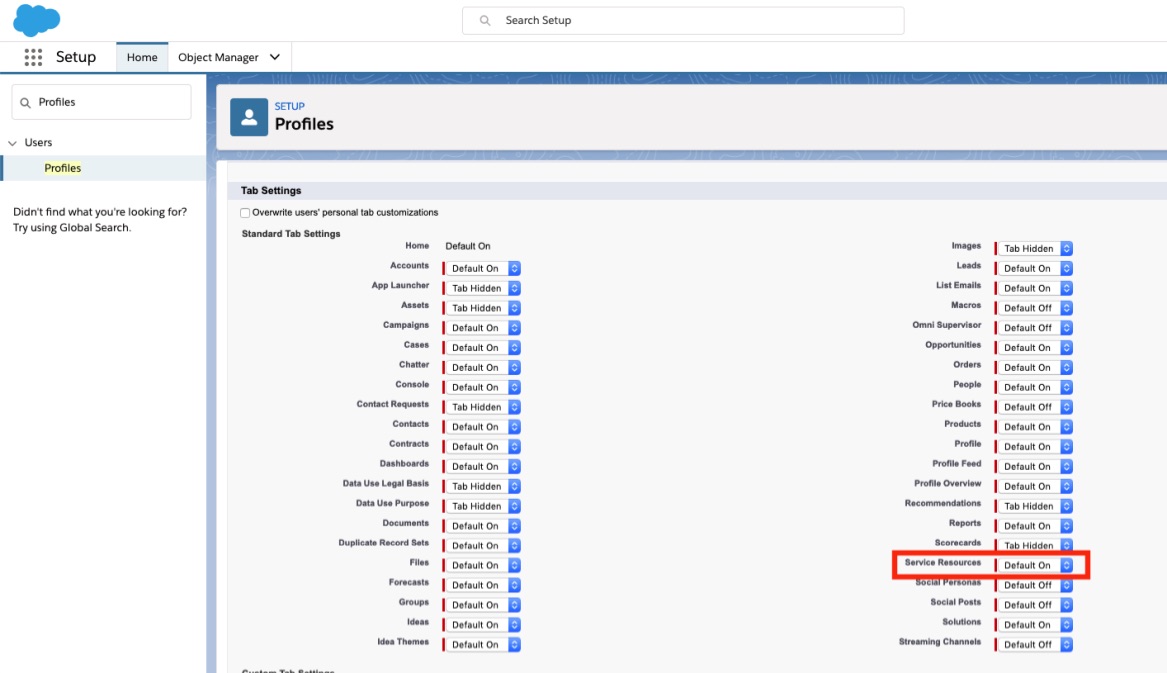
In the "Tab Settings" part, look for "Service Resources".
Check that it's on "Default On". If not, set it to this value
Step 2.4.2 Display the Service Resource tab
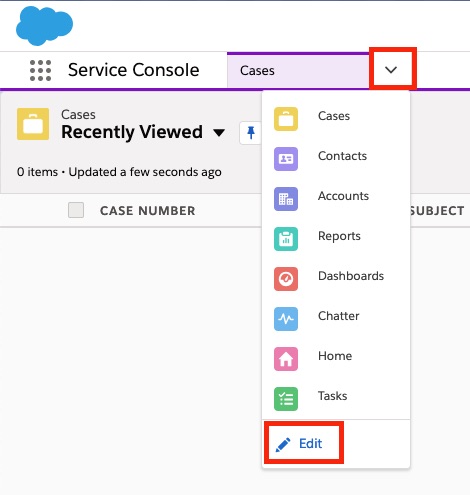
Go into the "Service Console" app in your org, or any application that is in console navigation
On the top left, where you can change the object type, click on the arrow, then "Edit"
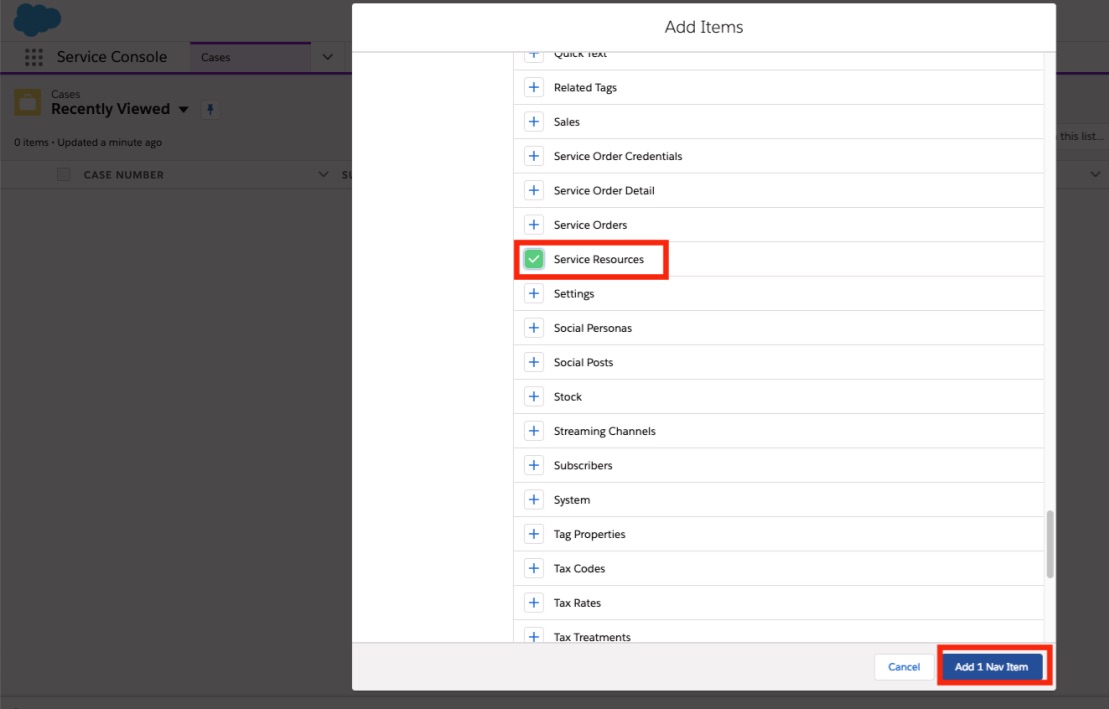
Click on "Add More Items" and search for "Service Resource"

Select this item and add it. Save everything
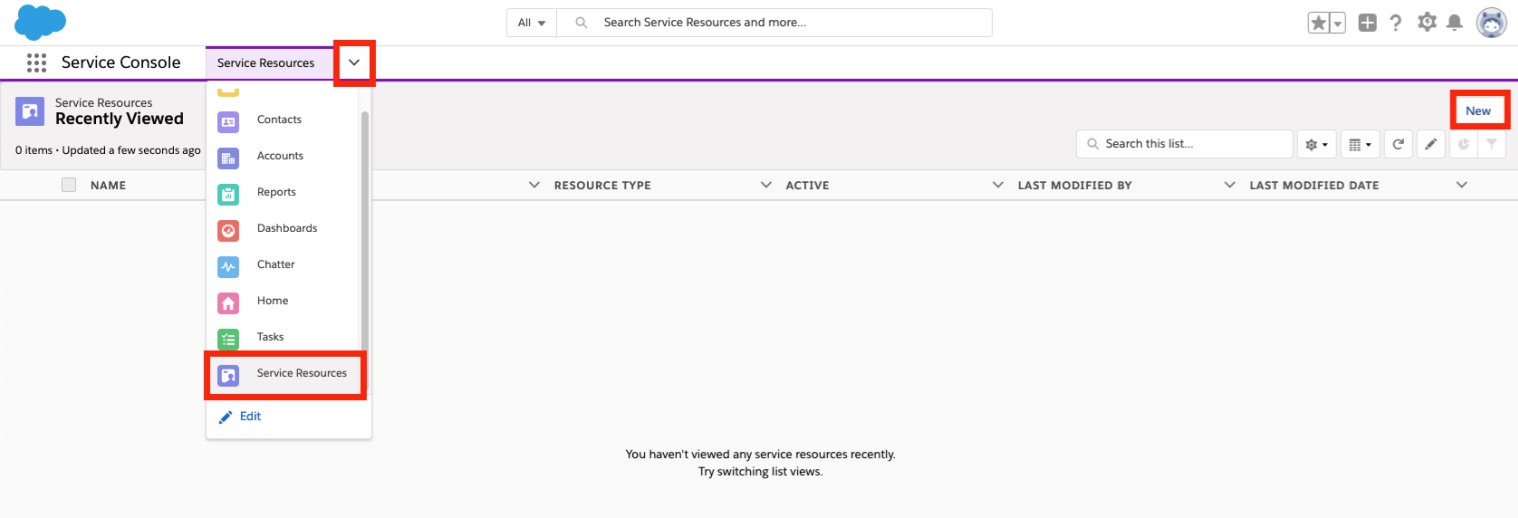
Step 2.4.3 Create the Service Resource tab
Select "Service Resources" in your application. Then click on "New"
Give a name to your new Service Resource. Select the user you want to allow access to Omnichannel. Set him as "Agent" in the resource type, and tick the active box

Save. Your user has now access to OmniChannel